
Save Email & Attachments
Save Button Behavior
The main Save button uses your configured Default save action. This means the first click can save the email and attachments immediately, save only the email, save only attachments, or open the selection dialog, depending on your preference.
You can change this behavior anytime in Settings. This is useful when you usually save the same type of content. For example, if you mostly save complete email conversations, choose Email + attachments. If you usually store only received files, choose Attachments only.
The Save button menu still lets you choose a different action for a single save operation without changing your default setting.
Available default actions
- Save email + attachments - saves the email message and all attachments.
- Save email - saves only the email message.
- Save attachments only - saves only attached files.
- Select items to save - opens the selection dialog so you can choose specific items and rename them before upload.
Select Items to Save
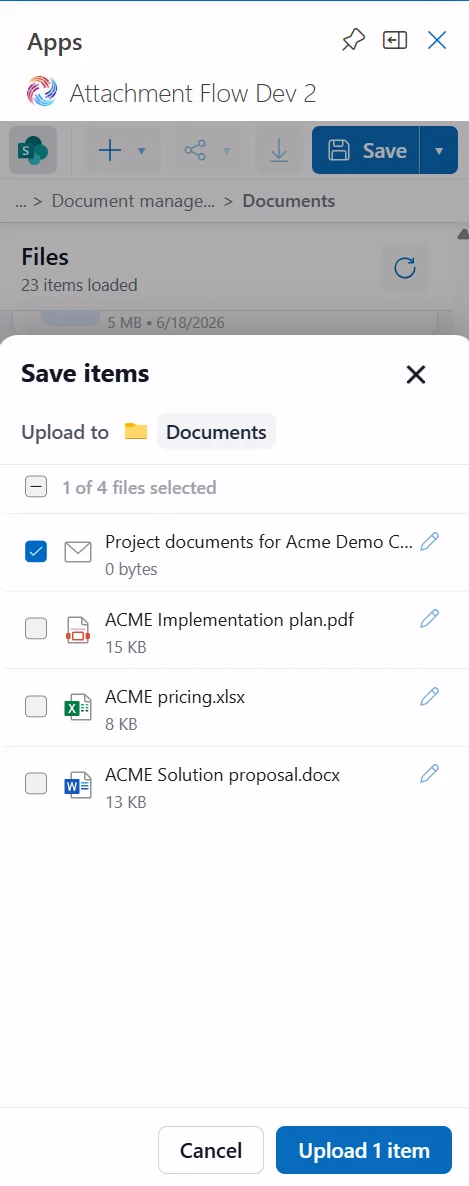
Use Select items to save when you want to choose exactly which parts of an Outlook email are uploaded to the current folder.
How it works
- Upload to shows the destination folder.
- The checkbox in the header can select or clear all items.
- Each row shows the email message or an attachment, including file type and size.
- The upload button updates to show how many items will be uploaded.
Select the email, one or more attachments, or any combination of available items. Click Upload to save the selected items, or Cancel to close the dialog.
Rename Before Upload
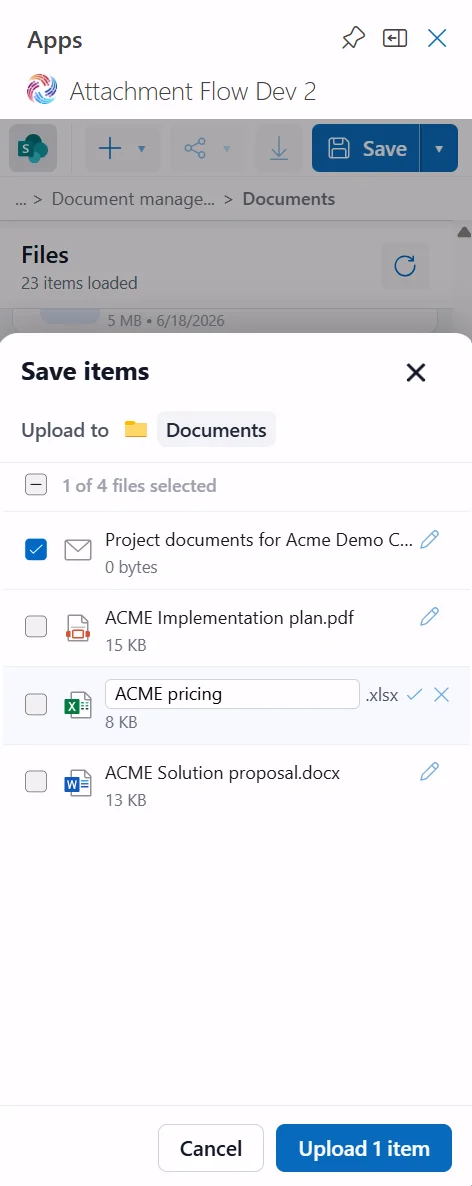
Click the edit icon on any item to rename it before upload. The extension remains visible for file attachments, while the editable field lets you change the base file name.
Actions
- Use the check icon to confirm the new name.
- Use the X icon to cancel the rename.
- After confirming names and selections, click Upload.